

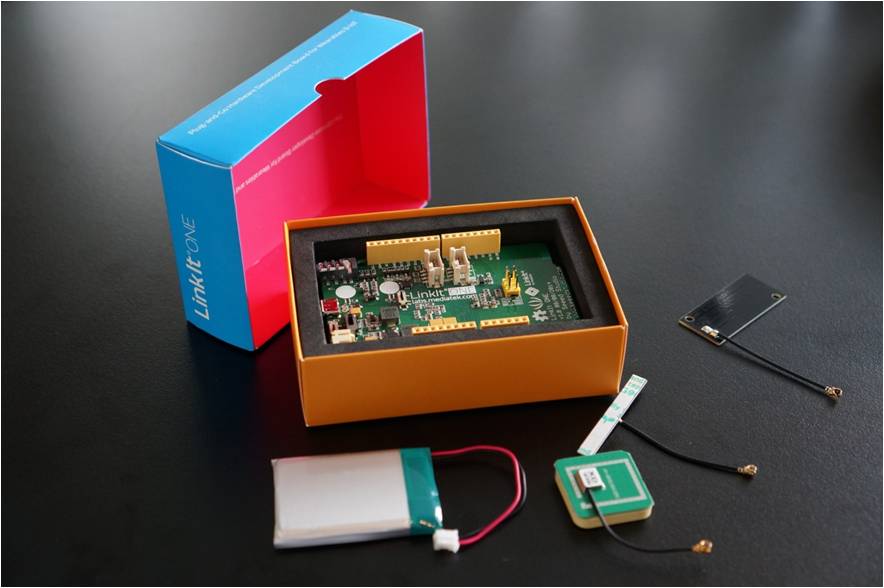
For kickstarting any IoT project, the basic requirement is a full featured development kit and a development environment. Linkit One is one of the open source high performance prototyping HDK (Hardware Development Kit) from Mediatek which has rich peripherals and interfaces like WIFI, BLE, GPS, GSM etc., in a single board which enables developers to prototype and build Wearable/IOT Devices without any external hardware dependency.
This credit card sized board is designed and co-developed by Seeedstudio and Mediatek. Officially, Mediatek provides Arduino IDE as the SDK for the Linkit One with Ardunio C API for developing any application.
I had earlier developed a BLE gateway for a food pantry solution concept using Linkit One and Arduino IDE for F&B industry. So after building some more interesting use cases, I have decided to try out more powerful open source IDE for Linkit One with more coding and debugging flexibility. I have found that Linkit Assist SDK can be used with Linkit One since both use the same Mediatek MT2502 System On Chip. I have followed the instructions on Linkit Assist Development Guide to install Eclipse SDK and setup the environment for Linkit ONE. So let’s dive in and explore how to setup your development environment for Linkit ONE on Eclipse
Setting up the ECLIPSE IDE for C/C++ Developers
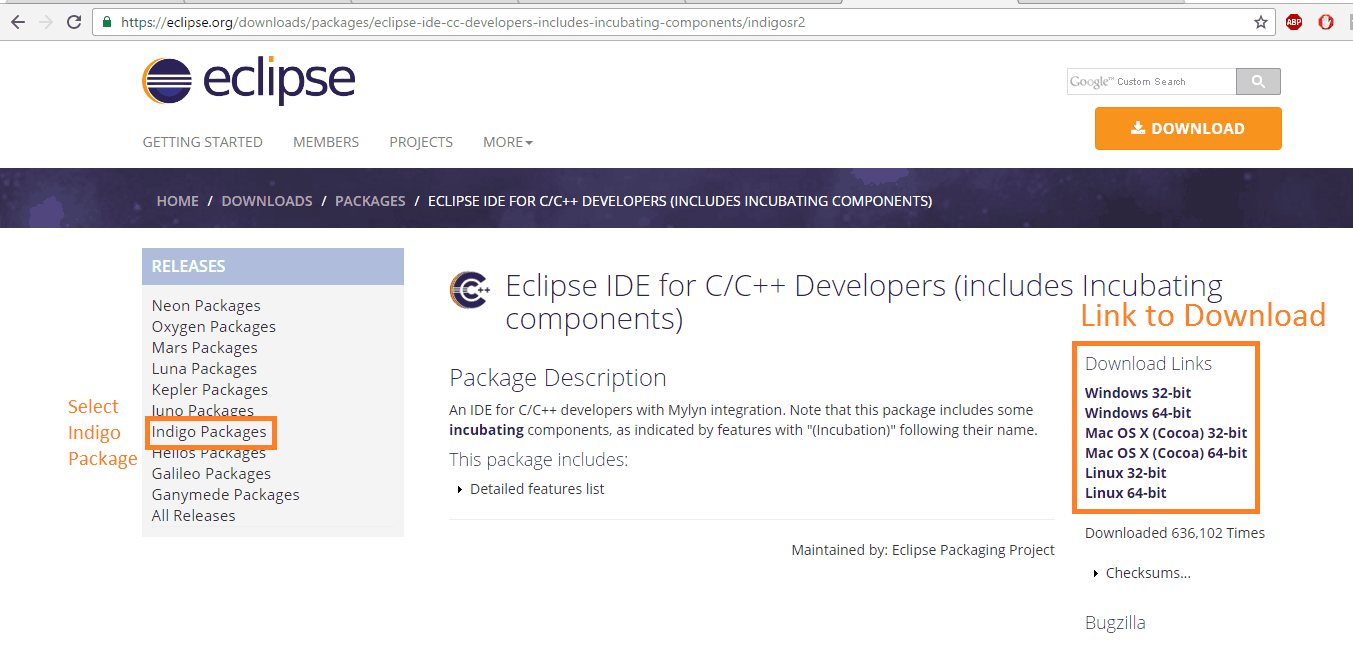
- Download the Eclipse IDE [Indigo] from here.
- Extract the downloaded Eclipse zip folder into C:\ drive.
Setting up the Linkit Assist SDK with Eclipse IDE
- Download the Mediatek Linkit Assist Eclipse Tools from here.
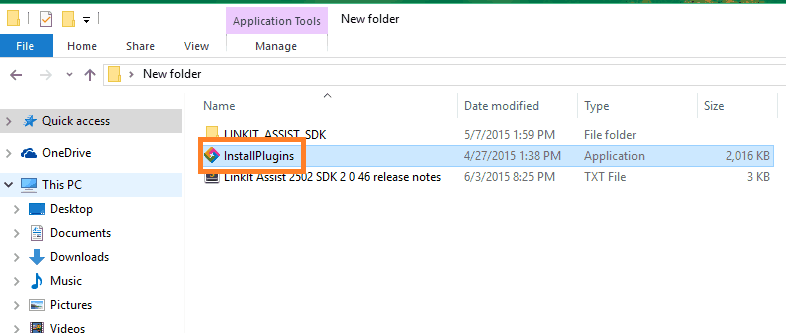
- Extract the downloaded Mediatek zip folder and run the Linkit ASSIST InstallPlugins file.
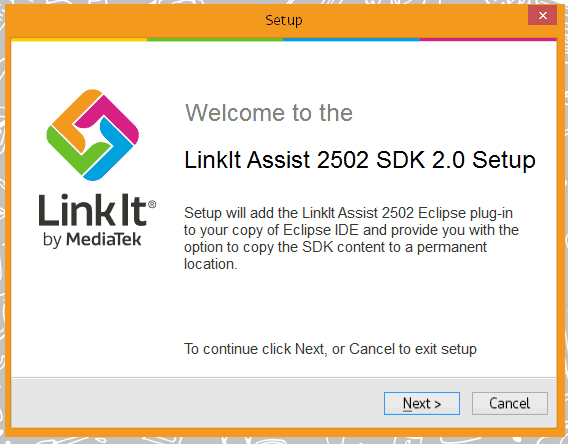
- Plugin Installation Starts with the welcome page click on Next.
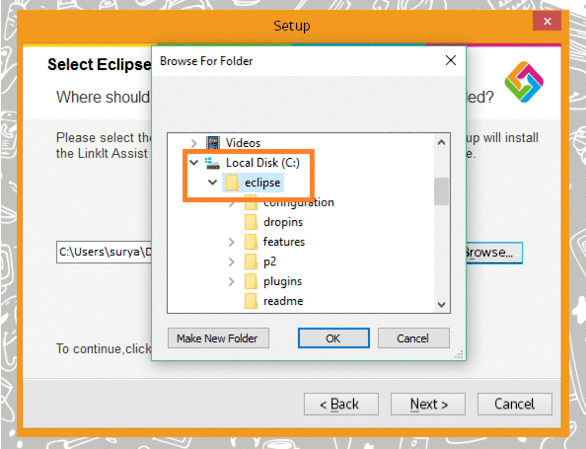
- Select Eclipse IDE Location, click Browse and locate the folder in which you installed Eclipse IDE.
- Under “Move SDK to permanent location” dialog, select the checkbox labelled “Move LinkIt Assist 2502 SDK 2.0 package to new folder” if you extracted the SDK to a temporary location. Click Browse to locate a permanent location in which to store the SDK.
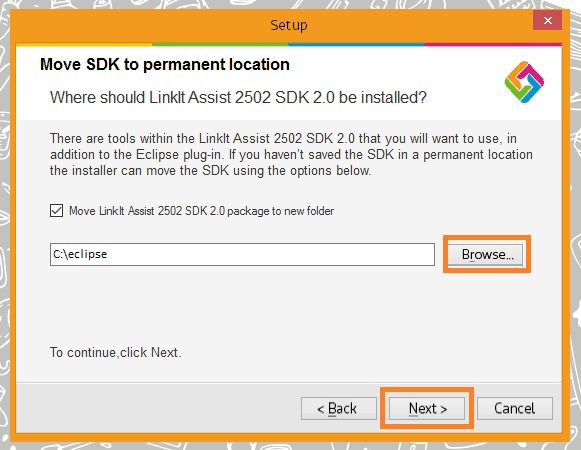
- Click Next.
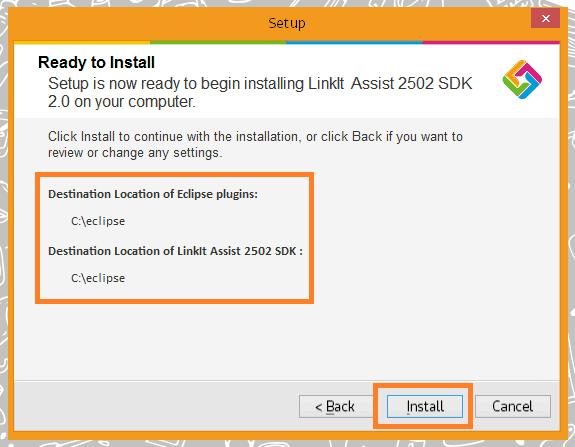
- In “Ready to Install”, check the selected file locations and if they are OK click Install.
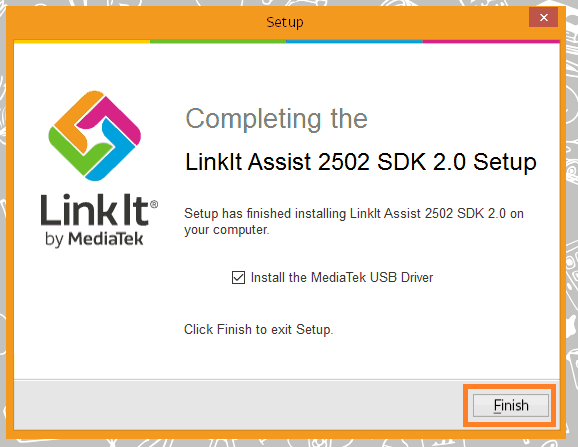
- Once the plug-in is installed and, if the option was taken, the SDK is moved the Completing the LinkIt Assist 2502 SDK 2.0 Setup page.
- Ensure that “Install the MediaTek USB Driver” checkbox is checked, then click Finish.
Firmware update for the Linkit One to Work with Assist SDK
To update the firmware, you have to use the Firmware Updater tool after installing new versions of SDK. You have to make make sure that the firmware of the development board corresponds to the SDK you just installed. Before you start programming applications in the Eclipse IDE please make sure the following is ready:
- Linkit One Hardware Development Kit.
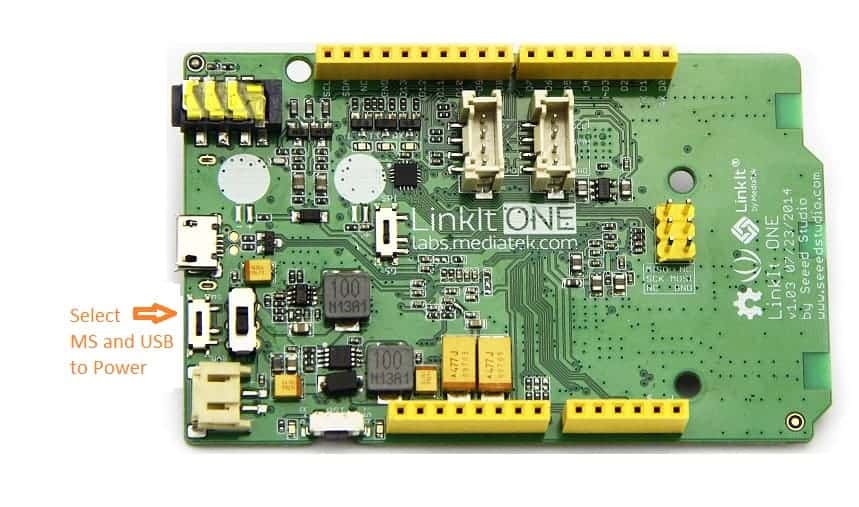
- Select Mass Storage[MS] Mode to update the firmware to the device and USB for Power up the device.
- Disconnect your Linkit development board from your Laptop.
- Launch LinkIt Firmware Updater.exe, which is located in the SDK folder under C:\eclipse\LINKIT_ASSIST_SDK\tools\FirmwareUpdater\

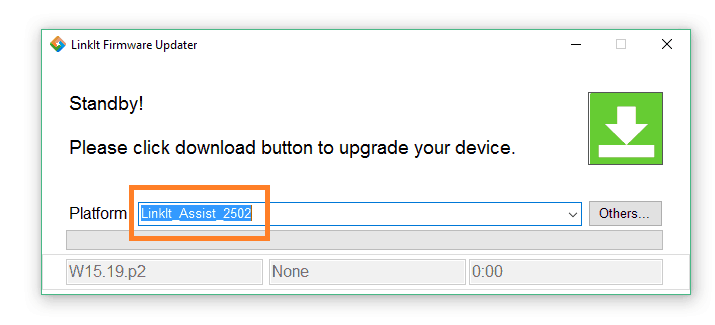
- Select Linkit_Assist_2502 Platform and now plug in the Linkit One board to the Laptop.
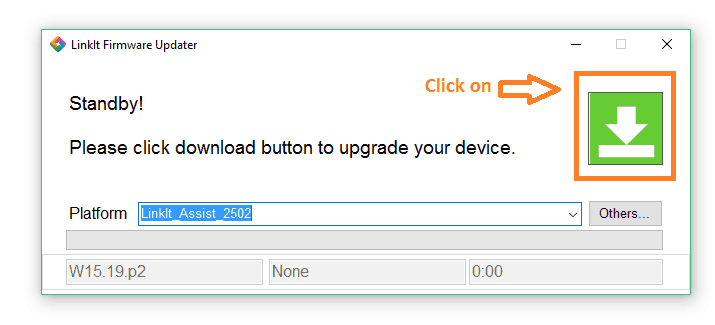
- Click on the Green Download button on the Updater.
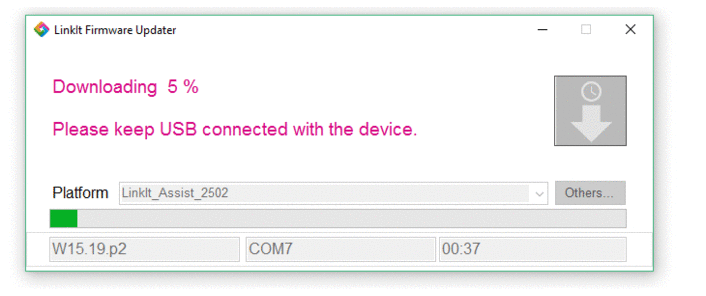
- The firmware is now downloaded to the development board. Do not disconnect the development board from your PC during this process.
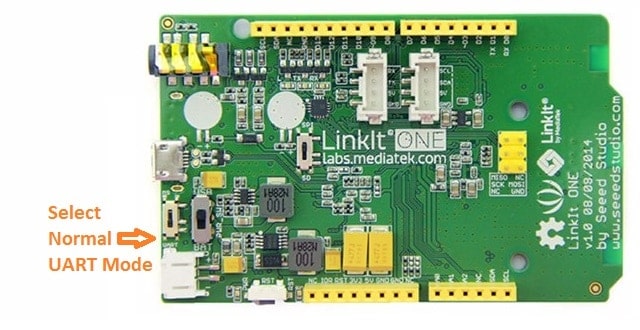
- Once the firmware dump is completed. Unplug the board from the laptop and switch back to the normal mode [UART Mode].
Start your First Project
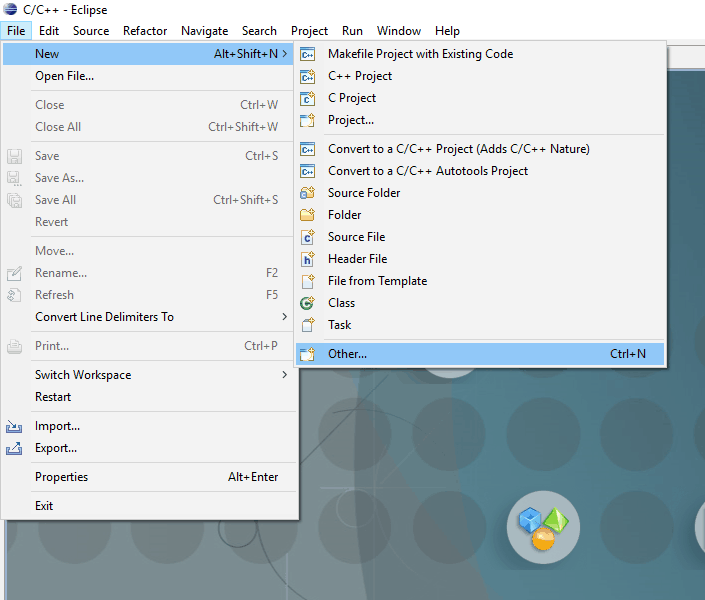
- The first step is to create a new Linkit Assist 2502 application. In the Eclipse IDE File menu, point to New and click Other or use the CTRL+N keyboard shortcut.
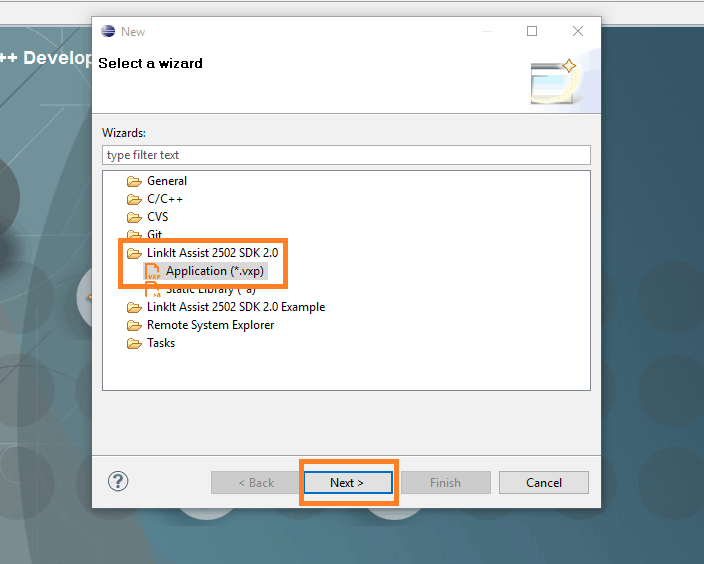
- Now, Expand the LinkIt 2.0 folder, select Application (*.vxp) and click Next.
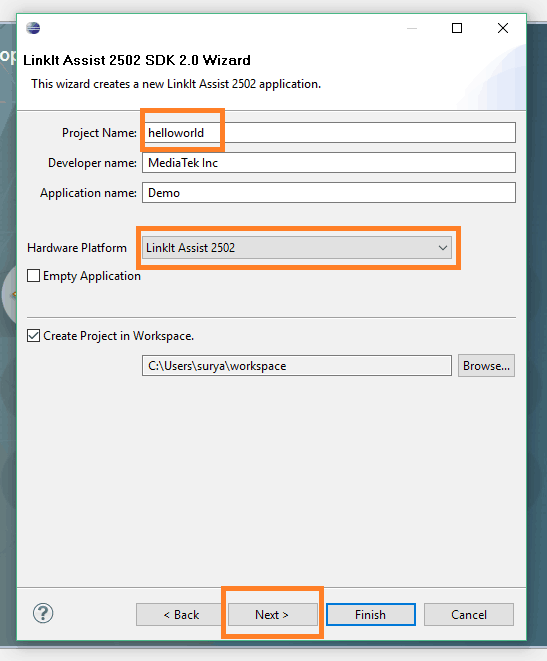
- Select a project name and proceed to next step.
- Proceed with default libraries for the first project and click Finish.
LED Blink on the Linkit One using Linkit Assist SDK
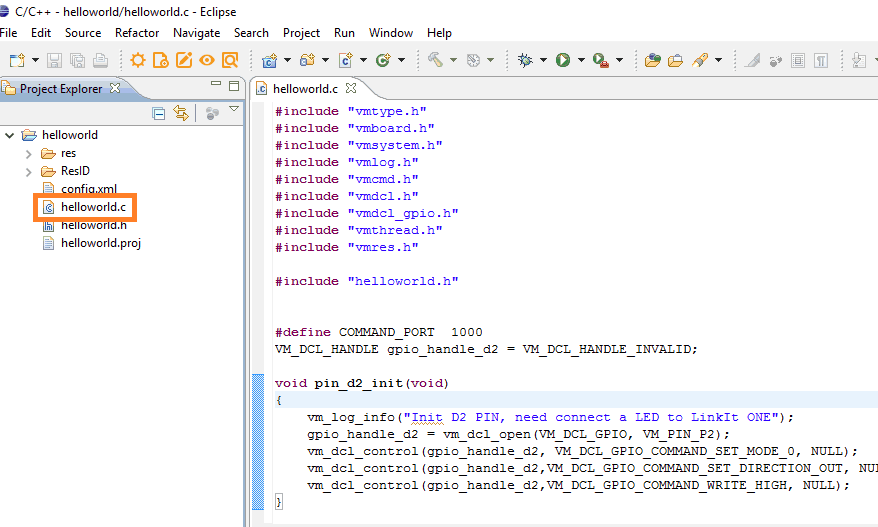
- Open the helloworld.c file, If you want to modify the pin number, you can do that or can leave with the default Digital Pin 2 which is the on-board LED.
- Click on Build to upload the program to the Linkit One.

- You can check the console to verify the program is successfully uploaded.

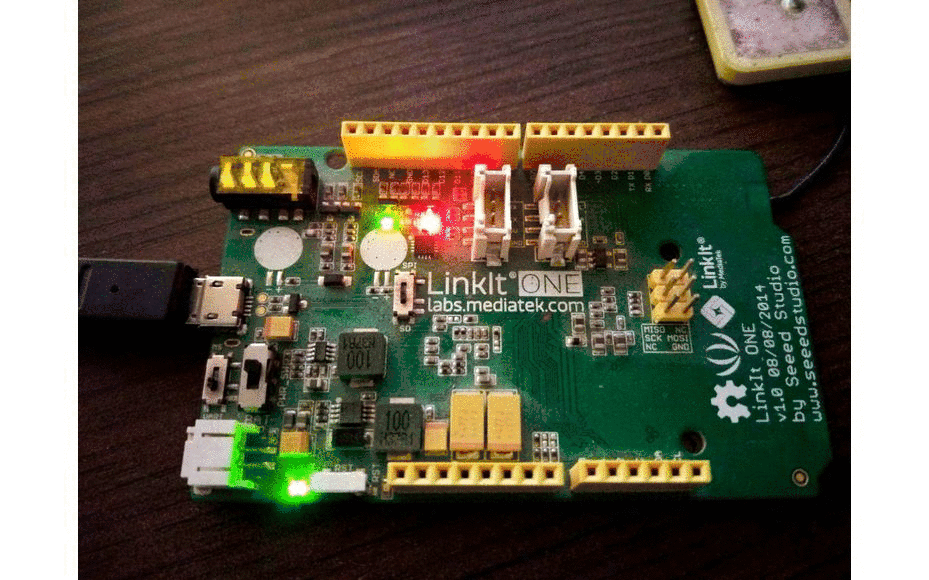
- Once the program is uploaded, you can see the LED Blinking on the Linkit One.
Now, you are ready to work on Linkit One with Eclipse IDE and follow Linkit Assist API to build any application using Linkit One. Also please share your experiences or any particular challenges that you might have faced while executing this setup. If u have any technical doubts then you can leave a comment below and I will get back to you.
