
In this post, we will learn how to run a Node JS server application behind the NGINX reverse proxy server.
What is a Reverse Proxy?
A proxy server is a go‑between or intermediary server that forwards requests for content from multiple clients to different servers across the Internet. A reverse proxy server is a type of proxy server that directs client requests to the appropriate backend server. It provides an additional level of abstraction and control to ensure the smooth flow of network traffic between clients and servers.
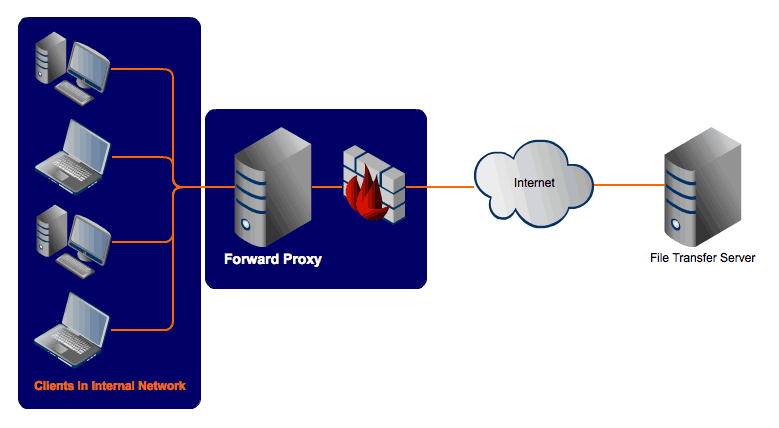
Forward Proxy (Image, Courtsey Jscape)
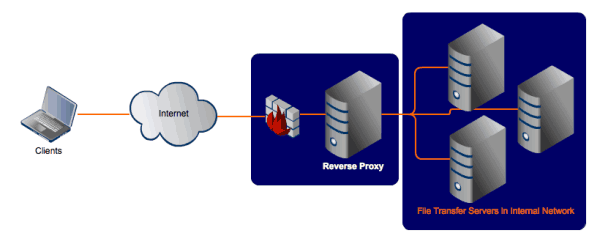
Reverse Proxy (Image, Courtsey Jscape)
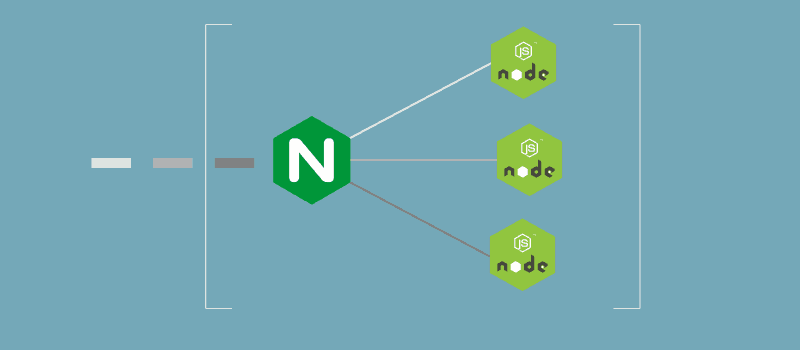
NGINX As Reverse Proxy
NGINX (pronounced “Engine X”) is a free, open-source, high-performance HTTP server. NGINX is known for its stability, simple configuration, and low resource consumption.The idea of using Nginx as a reverse proxy is to route the web client’s requests to the appropriate Node.js processes running in the backend. This is the prefered way to deploy production grade server applications.
Why deploy a reverse proxy on production web server?
- Modularized Functionality: With a reverse proxy, different components of the application can be hosted on different backend server applications. This way the functionality is split across multiple, independently running application modules.
- Load Balancing: With modularization, we can achieve load balancing in a way that no component of the server application is stressed with too many client requests.
- Faster Processing of Client Requests: Reverse proxy can serve the static files faster. Files such as images, CSS, js, and HTML do not require any dynamic processing or view generation and hence do not need to be passed to the backend Node.js applications.
- Ease of Error Handling: With a reverse proxy, we can easily display meaningful error pages or fall back onto a static site if the backend Node.js service is unavailable or crashes. Otherwise, users may just get a timed out connection which leads to bad user experience.
- Enhanced Security: Running another web server in front of Node.js may help to mitigate security flaws and DoS attacks against the server.
Installing NGINX in Ubuntu
Thanks to apt-get, installing NGINX on Ubuntu is as easy as pie
sudo apt-get install nginx
For official documentation, refer this link
Time to roll up your sleeves
Today you will walk away with the knowledge of building a web application which has NGINX as the front-end server acting as a reverse proxy for a backend Node.js server application. This will be the last demo of our Node.js learning series. So let’s roll up our sleeves and head over to GitHub to clone the demo source code from this repository.
Demo Application with NGINX
We will build this demo on top of the Node.js session demo application (with Cassandra) that we built previously.
Make sure that you generate the certificates for enabling HTTPS as specified in this post. However, for this demo, the HTTPS handling is taken over by NGINX, so the Node.js app doesn’t need to worry about it.
Follow along the sub-sections below to understand how to enable HTTPS and reverse proxy configuration in Nginx to make it work with the Node.js application.
Configuring NGINX
First of all, we’ll need to configure Nginx so that it forwards traffic to Node.js app. Let’s start off by modifying the default configuration file.
Copy this file to the ‘site-available’ directory under your Nginx installation and open it.
Here are the main sections of the file that explain the key configuration items for NGINX to work as the reverse proxy.
- First comes the server port configuration
server {
	listen 80;
	listen [::]:80 default_server ipv6only=on;
        return 301 https://$host$request_uri;
}
This tells NGINX to create a server listening on port 80 (the default HTTP port) for requests to 127.0.0.1 (localhost). It also contains 301 return, the HTTP response code for a permanent redirect of the host it is redirecting, and a backreference to $request_uri (localhost/paths).
- Then comes the SSL ports
listen 443;
ssl on;
ssl_protocols SSLv3 TLSv1 TLSv1.1 TLSv1.2;
We should also notice that the server block that handles the real request is listening on 443 instead of 80, which is the default SSL port.
- NGINX is handling the SSL stuff for the application. This is actually very handy, especially for Node.js applications, since they don’t even have to know that they are running in HTTPS mode. SSL certificates are linked to NGINX configuration file in line 12 & 13,
 ssl_certificate /Nodejs-Express-blog-series/nginxApp/nodeApp/keys/server.crt;
 ssl_certificate_key /Nodejs-Express-blog-series/nginxApp/nodeApp/keys/server.key;
- The first location block handles the processing of static files such as images, javascript, CSS, etc.
location ~ ^/(assets/|images/|img/|javascript/|js/|css/|style/|flash/|media/|static/|robots.txt|humans.txt|favicon.ico){ root /Nodejs-Express-blog-series/nginxApp/nodeApp/public/; access_log on; error_log on; expires 5m; } - In the last location block, we need to configure is the reverse proxy settings. You can have more than one of these in a server block, but don’t worry about that for now. The only important value in here is, proxy_pass. It controls where Nginx will route requests to. For this demo we want the root URL (‘/’) to be served by the Node.js server running on http://127.0.0.1:3000. The rest of the values are boilerplate, and we will not be tweaking them here.
proxy_pass http://127.0.0.1:3000;
Applying the Configuration
Let’s restart Nginx so that it loads the configuration:
sudo service nginx restart
Check the configuration for syntax errors by typing:
sudo nginx -t
Demo Application Output
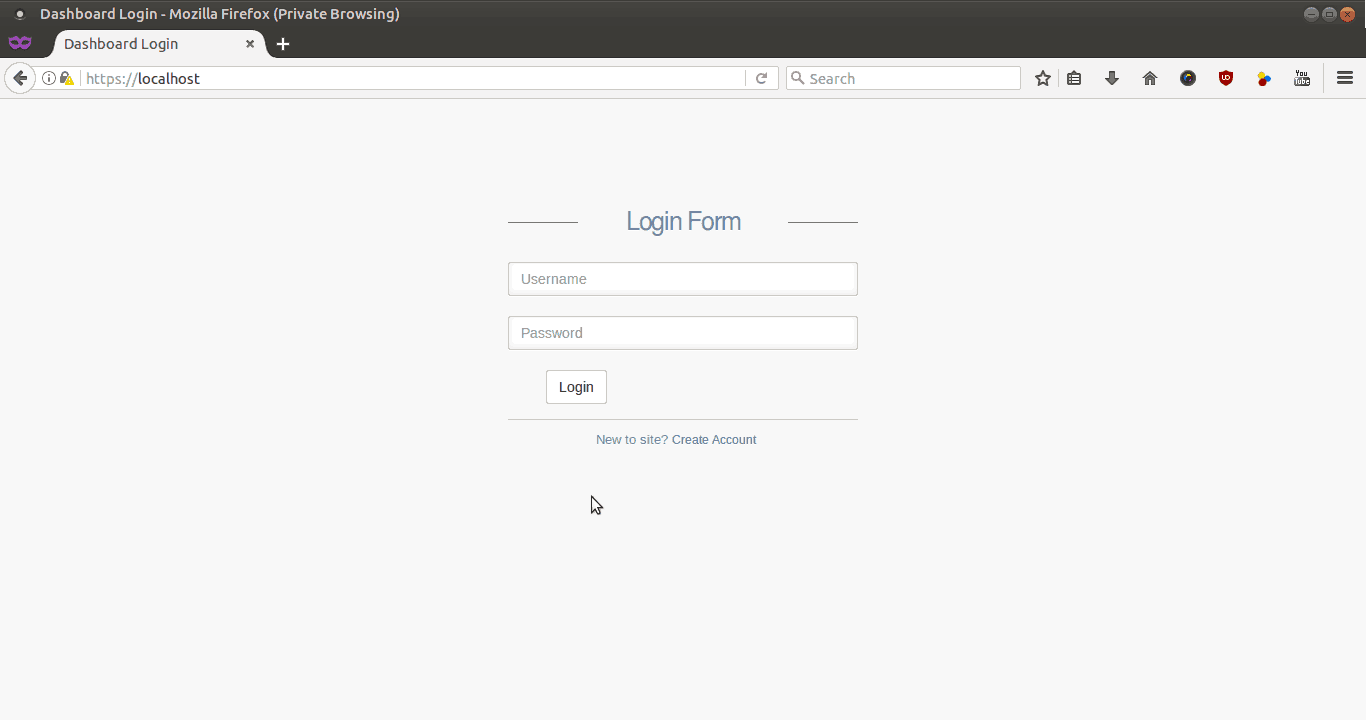
After configuring the Nginx , run the Node.js app which will start listening on localhost’s port number 3000. Then open the link https://localhost/ in a web browser and you can see the login page.
Go ahead and register a new user. Once I registered my name, and logged in again, the page appears like this.
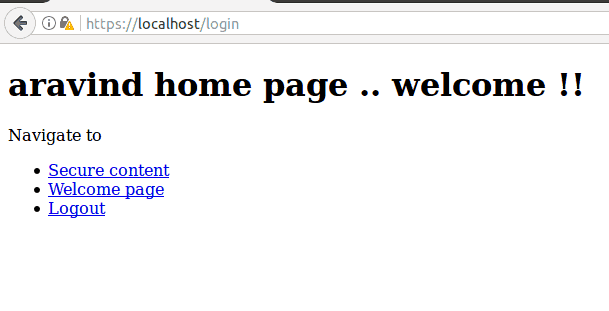
NGINX is now intercepting all client requests and forwarding it to the Node.js application for handling. You can also see that the browser is secured with HTTPS and you can invoke your express routes and views defined in the Node.js backend server.
Final Thoughts on Node.js
I hope I have covered all the fundamental concepts of getting started with Node.js/Express.js for building a server-side web application. In case you feel that there are some more concepts that are essential for the armor of a Node.js server app developer then please post your thoughts in the comments section below. I will try my best to learn them and post here as part of this series.
Thanks for reading through this Node.js learning series blog posts. If you have followed this and all my previous posts then I hope that you are now armed with the essential knowledge of how to build a web application. Otherwise also, you can always use these posts as a ready reckoner. I will be back soon with some more stuff on the future of the web.

Why the CSS and JS are not loading. How do we pass the relative path on proxy pass ?