
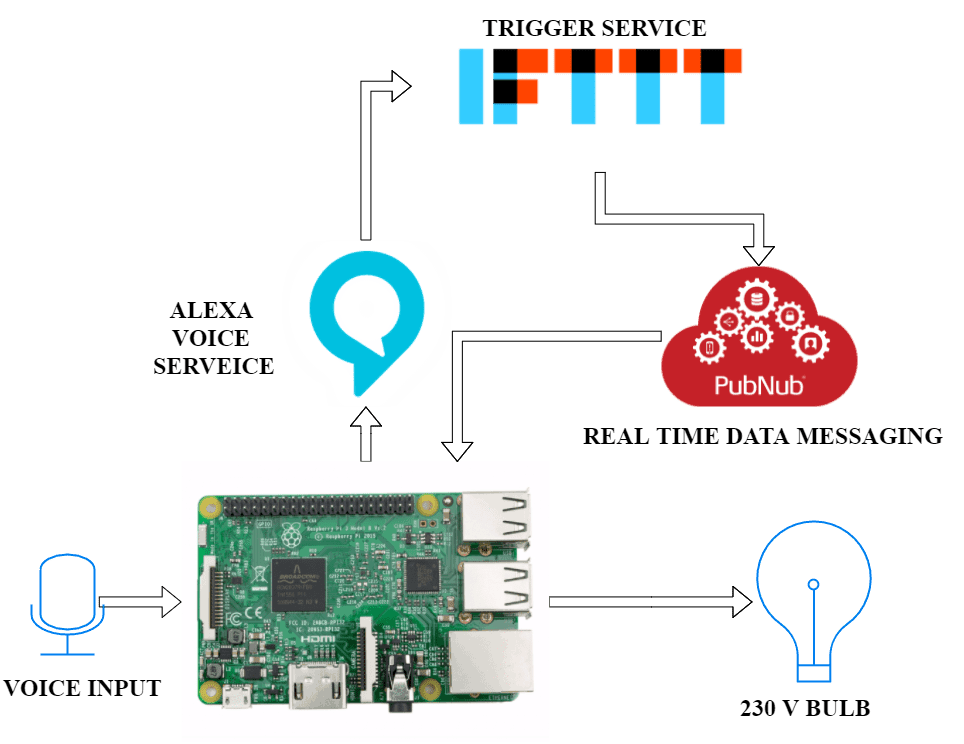
Continuing from Part 1 where we setup Alexa voice service with the Raspberry Pi, this post will conclude and demonstrate the home automation system that we set out to build. So let’s check out the nitty gritty of building the final solution using Amazon Alexa.
Prerequisites
- Device created on Alexa Voice Service [to Create new device, follow Part 1]
- Install PubNub Python SDK 3.9 Version from the official link in the Raspberry Pi.
Steps to be followed
- Setting up Hardware Connection
- Obtain the API Keys from the PubNub
- Setting up IFTTT with Amazon Alexa Service
- Run the Python Script on RPi to Control the Light
Setting up Hardware Connection
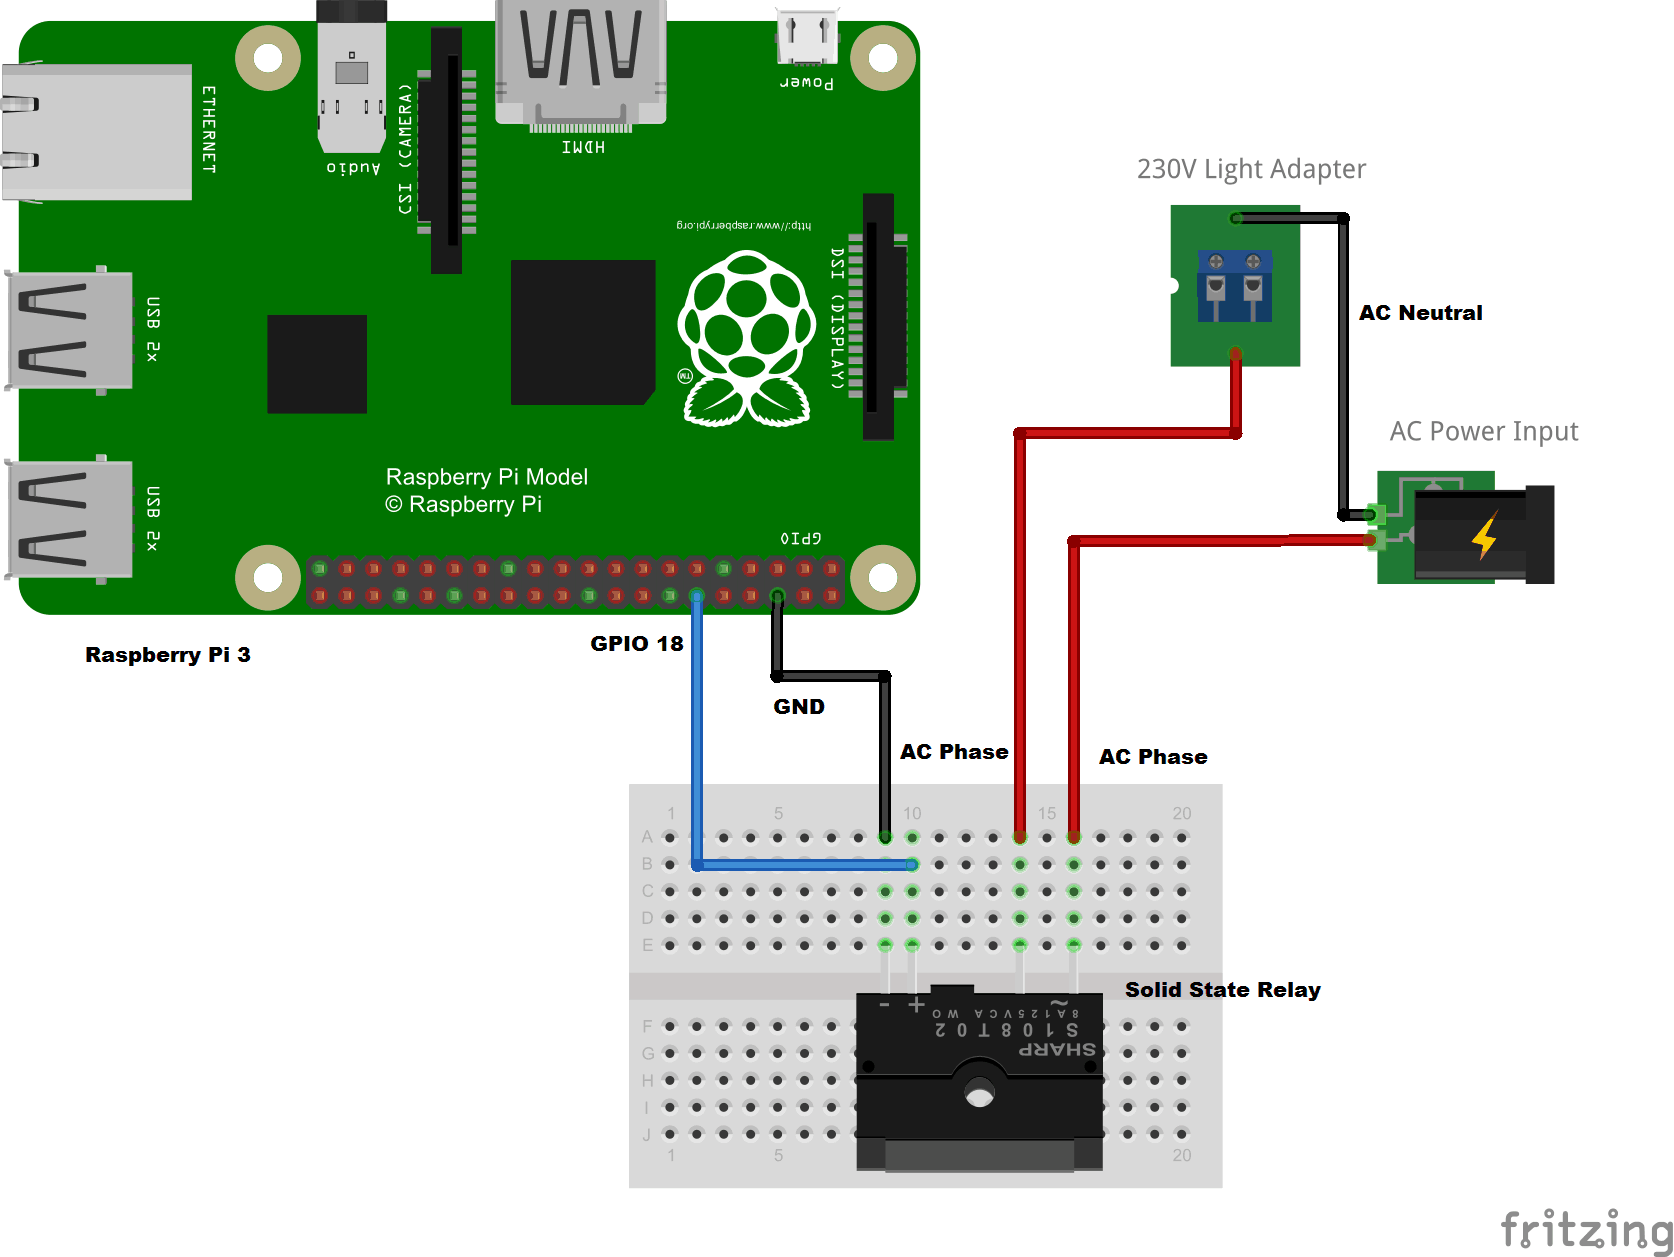
Hardware Schematic
Follow the schematic and make the connections. The SSR Trigger is connected to the GPIO18. (Note that this schematic does not show the speaker and mic connections that was covered in part 1)
Actual Setup
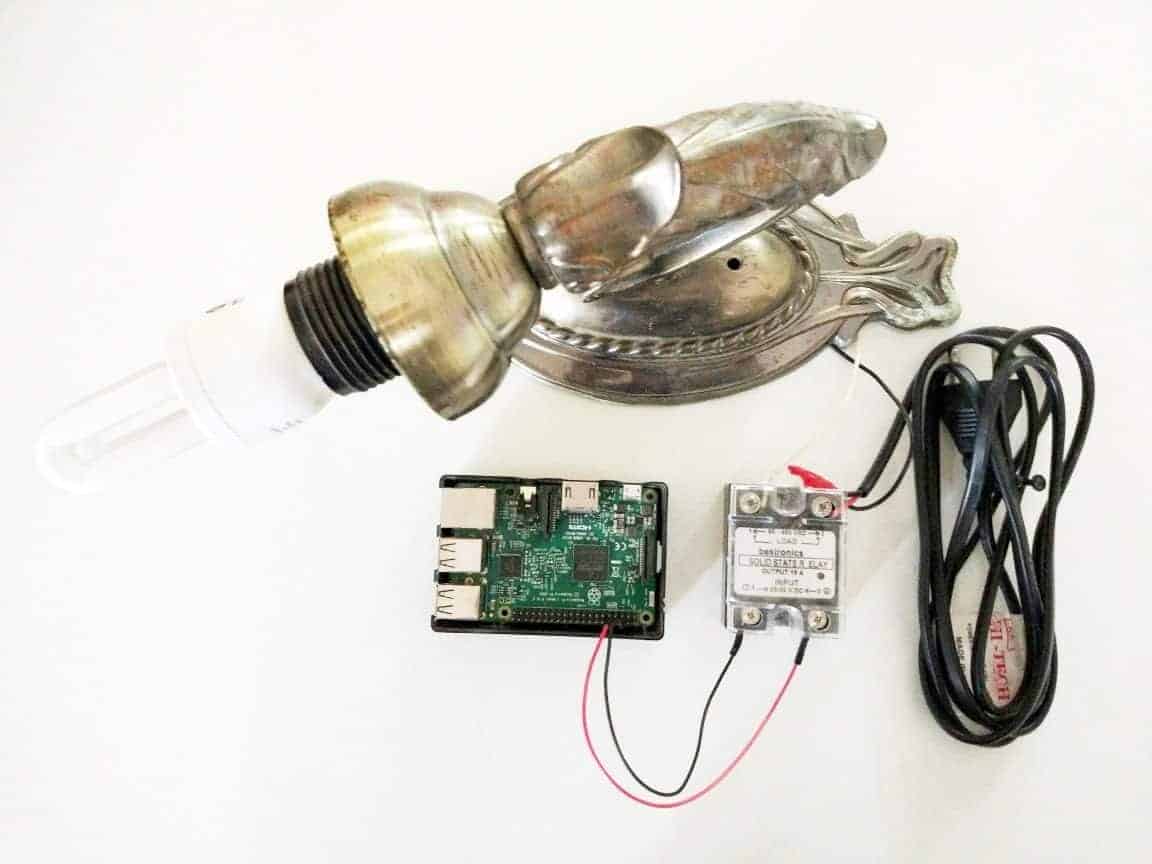
Once the hardware part is ready, let’s setup the web part.
Obtain the API Keys from the PubNub
PubNub is a global Data Stream Network (DSN) and realtime infrastructure-as-a-service (IaaS) company based in San Francisco, California. The company makes products for software and hardware developers to build realtime web, mobile, and Internet of Things (IoT) applications – source Wikipedia.
In this demo, we are using PubNub to signal the light switch on/off commands from IFTTT cloud to RPi.
Follow the steps for obtaining API Keys for Data Messaging,
- Login to PubNub with your credentials.
- Select My First Pubnub App
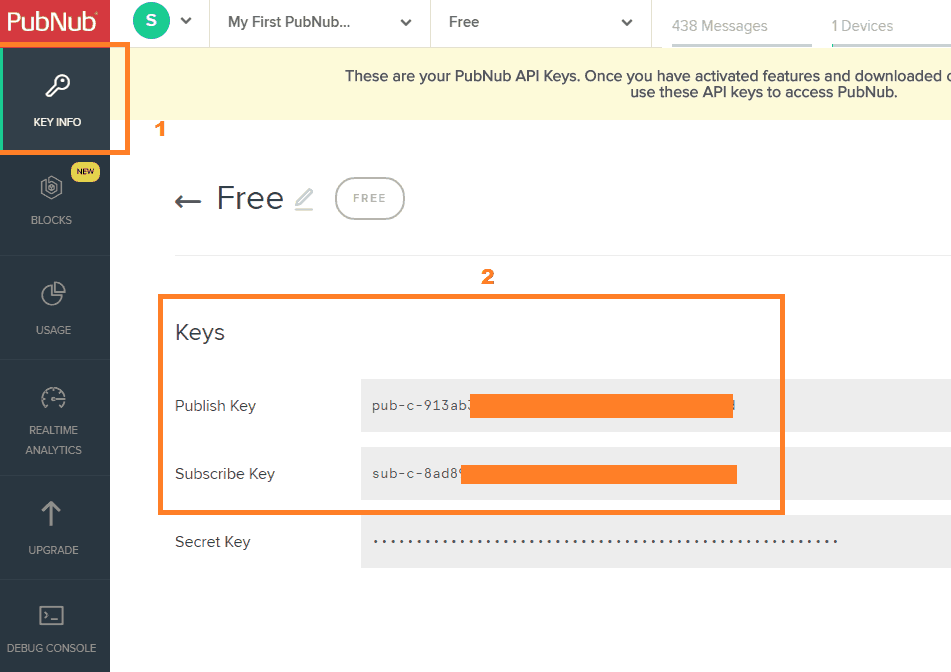
- On your My First Pubnub App, Select the Free Keys
- On Key Info, Obtain the Publish and Subscribe Keys we will be using later on.
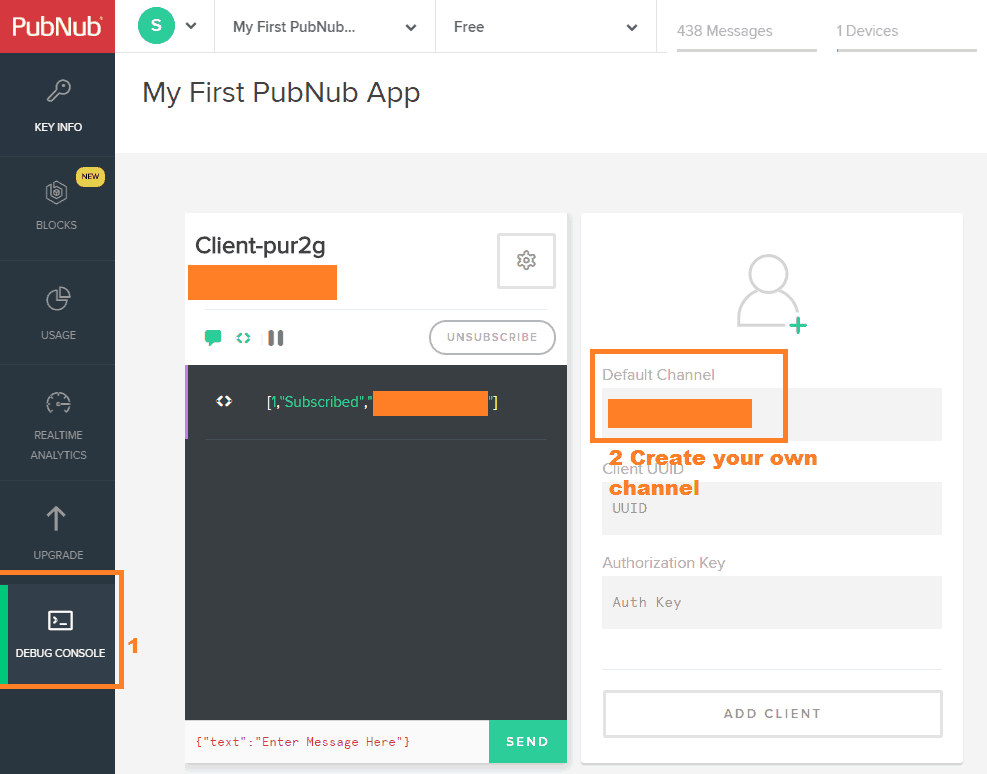
- PubNub also provides Debug Console for viewing the messages on the specific channels, Click on the Debug Console to debug the messages. You will not see any messages until you start running the application so read on and follow the steps in the next section.
PubNub provides 70+ SDK’s for various programming languages, for this project we need to follow the following SDK’s,
- Python SDK for Raspberry Pi
- REST API for IFTTT Trigger Message
Setting up IFTTT with Amazon Alexa Service
IFTTT is a free web-based service that allows users to create chains of simple conditional statements, called “recipes”, which are triggered based on changes to other web services such as Gmail, Facebook, Instagram, and Pinterest. IFTTT is an abbreviation of “If This Then That” (pronounced like “gift” without the “g”) – Source Wikipedia.
For this demo, IFTTT is used to trigger the light switch on/off commands based on the speech command received by Alexa service running on RPi.
Let’s sync up the Alexa Service with IFTTT,
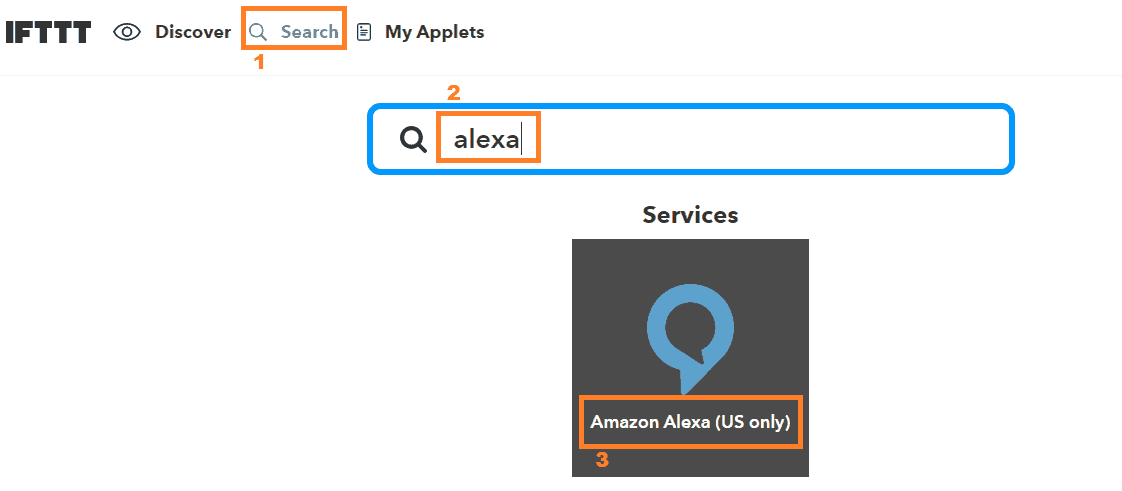
- Login to IFTTT with your credentials.
- Search for Alexa Service, and click on Amazon Alexa (US Only).
- Click on Connect, and sign in with your amazon developer account credentials.
- Once the IFTTT is synced with Amazon Alexa, now we can create a recipe to provide a trigger to turn on and turn off the light.
- On My Applets, Click on New Applet
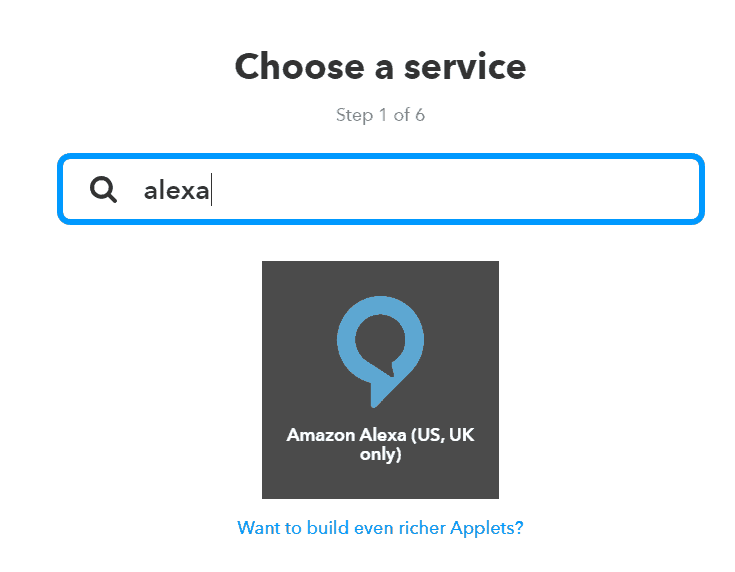
- Click on +this

- Search for Alexa
- Choose the trigger, Say a specific phrase
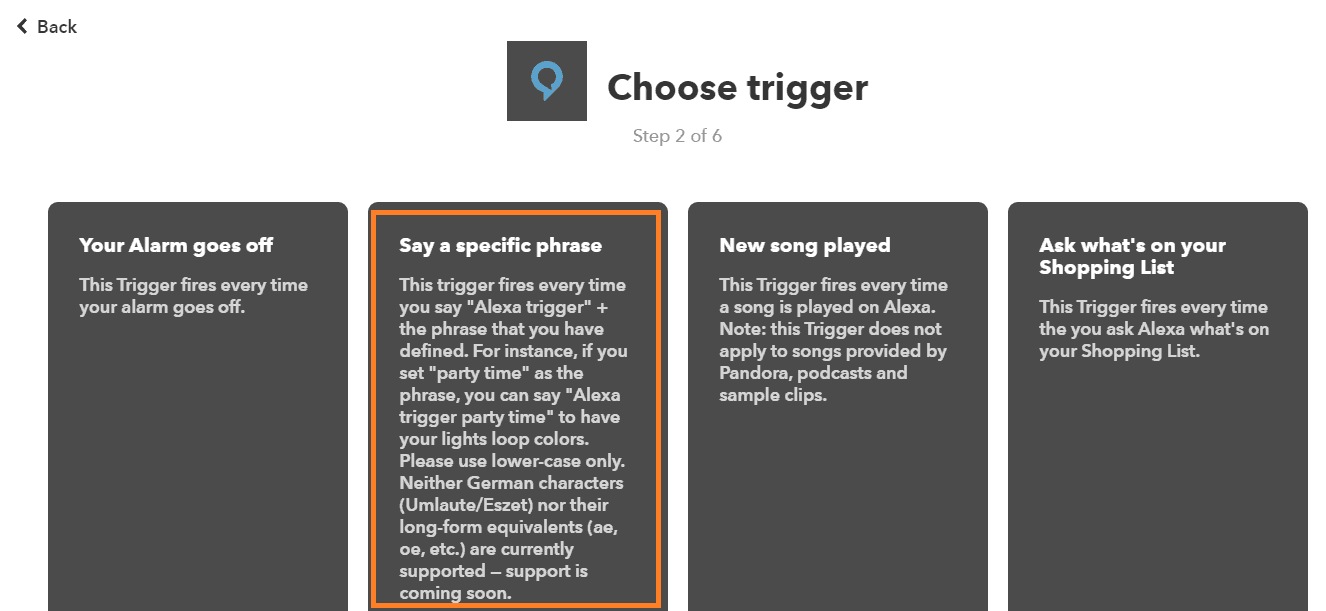
- Provide “turn on the light” as the phrase, click on Create Trigger.
- Click on +that

- Search for Maker, click on Maker and Select Make a Web Request

- Maker provides the REST WEB Request, Use the Publish and Subscribe keys obtained from the PubNub and modify the following URL.
http://pubsub.pubnub.com//publish/
pub_key/sub_key/0/alexaTrigger/0/{"requester":"Alexa","trigger":"light","status":1} - Paste the modified URL to the URL text box.
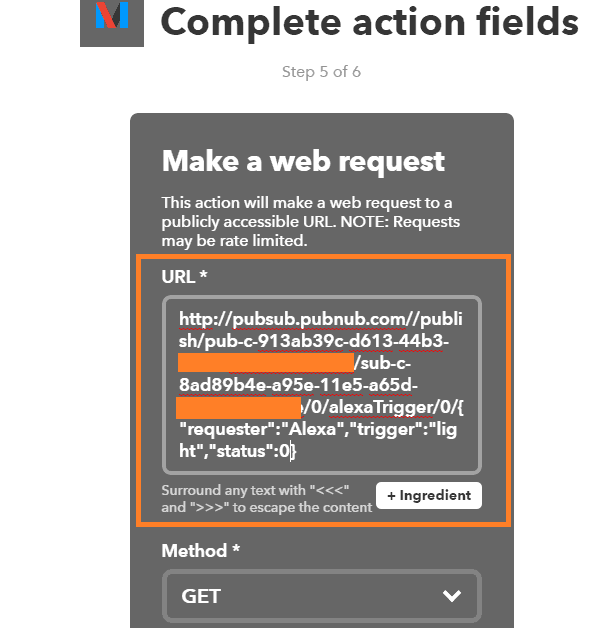
- Set the Method as GET, Content as application/json and click on save.
- Follow the same steps to create the trigger for “turn off the light” and modify the URL to the following.
http://pubsub.pubnub.com//publish/pub_key/sub_key/0/alexaTrigger/0/{"requester":"Alexa","trigger":"light","status":0}
We are now ready with all the web components for the demo.
Run the Python Script on RPi to Control the Light
In this Python script, the RPi subscribes to the PubNub and waits for the trigger messages. It then controls the light according to the trigger messages.
-
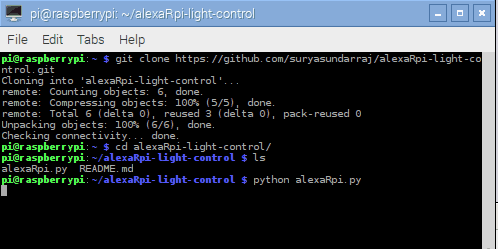
- Clone the Repository by using the following command under the RPi terminal
https://github.com/suryasundarraj/alexaRpi-light-control.git
Refer the README file to check the pre requisites before executing the code contained in this repository under RPi.
- Open the python script alexaRpi-light-control/alexaRpi.py
- Modify the Publish Key and Subscribe Keys from the PubNub on Line Number 7 and 8
- Run the Script
python alexaRpi.py
- Clone the Repository by using the following command under the RPi terminal
Now we are all set for the demo, Make sure you are running all the three services from the Part 1 (the three terminals) before continuing.
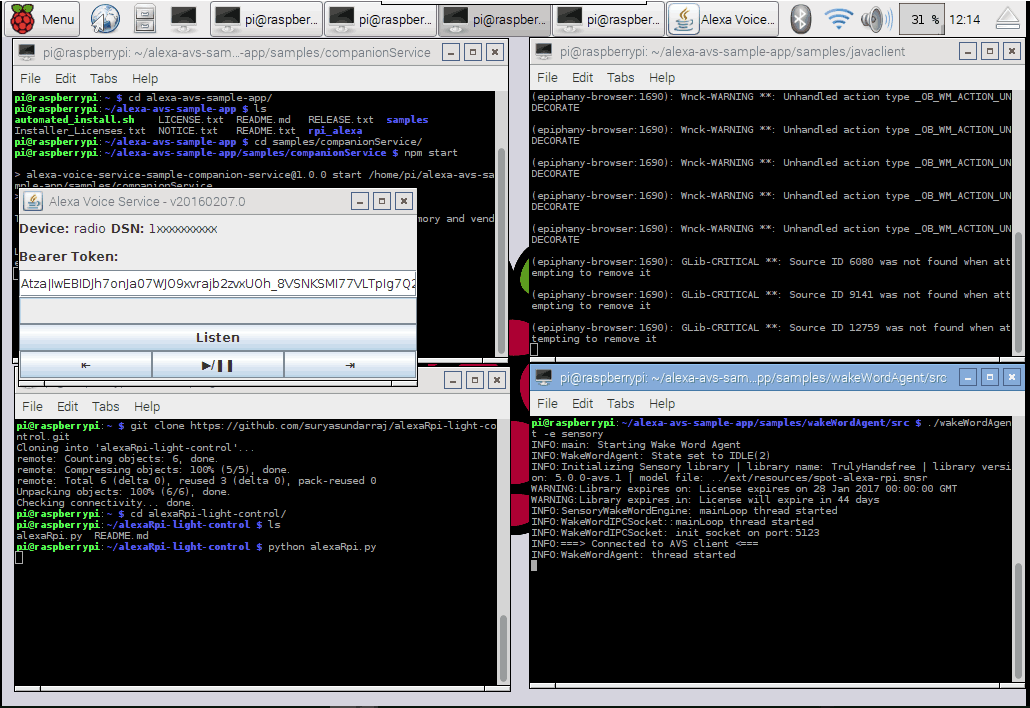
To issue any command you need to wake up Alexa service by calling “Alexa” each time you want to send a command. You will hear a beep sound. Once you hear the beep, say “Alexa Trigger Turn on the Light.” You can see the light turns ON within a moment. And then if you say “Alexa Trigger Turn off the Light”, the light should turn OFF.
We have done it !!
Do share your feedback about this demo and I also look forward to receiving your suggestions to make it more feature rich. If u have any technical doubts then you can post your comments below and I will get back to you.
