

In this tutorial, we’ll demonstrate how to use Raspberry Pi’s multimedia capabilities to host a text-to-speech audio broadcast service. If you want to use Raspberry Pi as a public address system or even an accompanying audio announcement device with digital signage, then read on and check out the demo project.
Note: This post was first published in PubNub blog.
Project Overview
The Raspberry Pi audio broadcasting service runs as a peer-to-peer application powered by PubNub Data Stream. On one end, we have the requester peer which sends a request for audio broadcast. And on the other end, there is a broadcaster application running on the Raspberry Pi 3. The requester sends a text sentence within a PubNub payload and the broadcaster converts it to speech and sends it to the Raspberry Pi’s audio output.
Raspberry Pi Audio Setup
We need to first setup the audio driver for Raspberry Pi. For this application, we are using a standard USB sound card which attaches to one of the USB ports of the Raspberry Pi. We’ll be using a standard desktop speaker from Lenovo, but feel free to use any speak system you want.

Firet, we’ll set up the sound device on the Raspberry Pi and direct the sound output to the USB sound card. Follow the steps below to setup sound configuration for Raspberry Pi 3.
Step 0: Software Installation and Driver Loading
Raspbian OS (Jessie Lite) follows the Advanced Linux Sound Architecture (ALSA) for managing audio devices. We have to install a few packages to test the sound device through ALSA. Using the apt-get utility, install the following packages ( you will need admin privileges to install these packages)
apt-get install alsa-utils
apt-get install mpg321
apt-get install lame
Load the sound driver as follows:
modprobe snd-bcm2835
Step 1: Connect & Detect the Audio Hardware
Make sure that the Raspberry Pi is powered off. Connect the USB sound card to one of the USB ports of the Pi and power on the Pi. Once the Raspbian OS has booted, make sure that the audio hardware has been detected. To check this, log on to the terminal (either through SSH or LXTerminal app) and issue the ‘lsusb’ command.
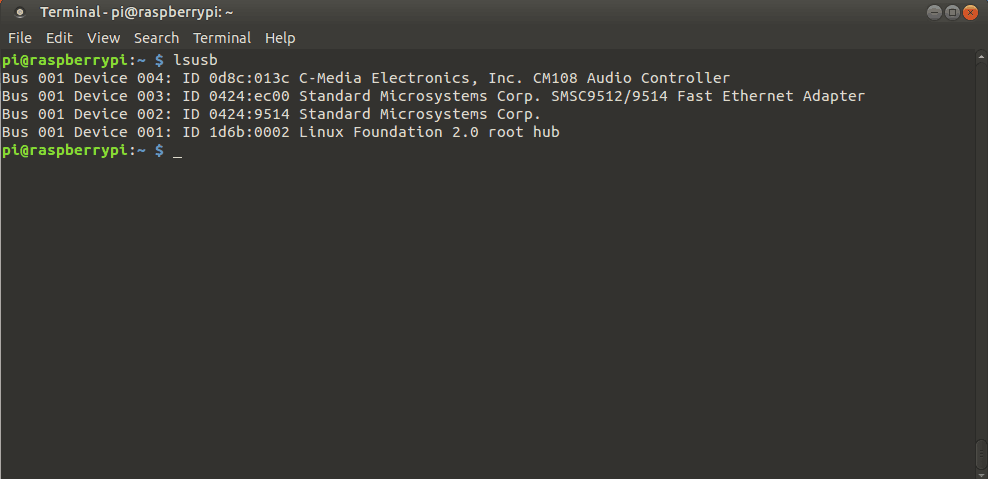
As you can see, the first device listed in the USB port list is the audio sound card.
Step 2: Enable USB Audio Device in ALSA
By default, the Raspberry Pi sound driver is configured to use a built in PCM audio device. As we are using the external USB audio card, we have to make a configuration setting to let the ALSA know about our external USB sound card.
First of all, check to see what order your cards have been loaded in:
$ cat /proc/asound/modules
 0 snd_bcm2835
 1 snd_usb_audio
Counting cards begins from 0 so the default bcm2835 is loaded first and USB card which has our speaker is loaded second.
If you wish to play with normal audio connector directly (without USB) , In this case without any configurations , you can directly connect the speaker’s audio connector to the raspberry pi 3’s audio jack and play any sound through PCM audio device card which is by default the audio driver of raspberry pi3.
To reorder the cards, we’ll first create a file named /etc/modprobe.d/alsa-base.conf. It can be named anything you want as long as it ends with .conf. Then add the following:
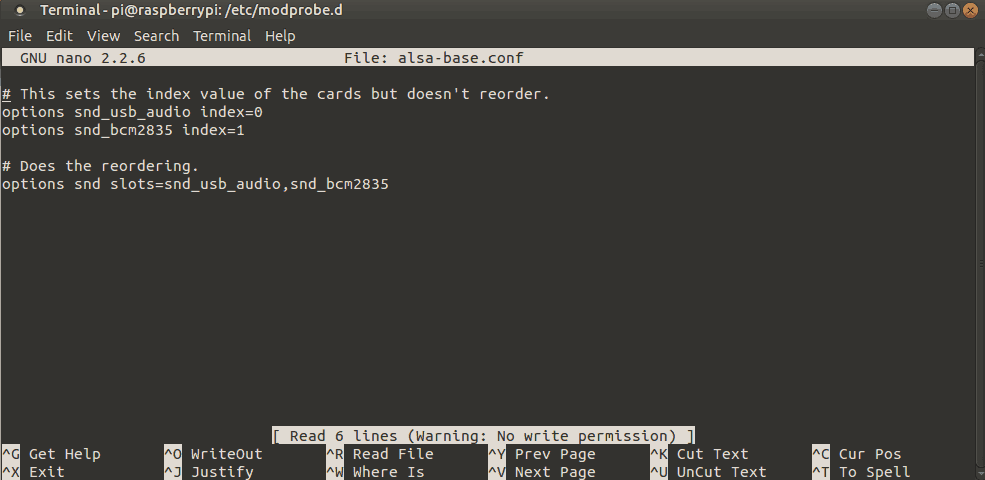
The comments should explain what each line does. Once you do that, you have to reboot your machine for it to work.
Once you reboot, you should be able to play any audio through your USB card.
This will make our USB card the default card with index=0 . Once we do that, this is what our /proc/asound/modules looked like:
 0 snd_usb_audio
 1 snd_bcm2835
If you wish to bounce back to default PCM configuration , edit this /etc/modprobe.d/alsa-base.conf file by changing the index value and reordering the slots.
Step 3: Test Audio Configuration
With the Raspberry Pi restarted, run the following command from the terminal prompt to see the current audio configuration:
$ amixer

You will now notice a detailed information about the sound card capabilities including sound playback and sound capture.
Step 4: Audio Output Selection
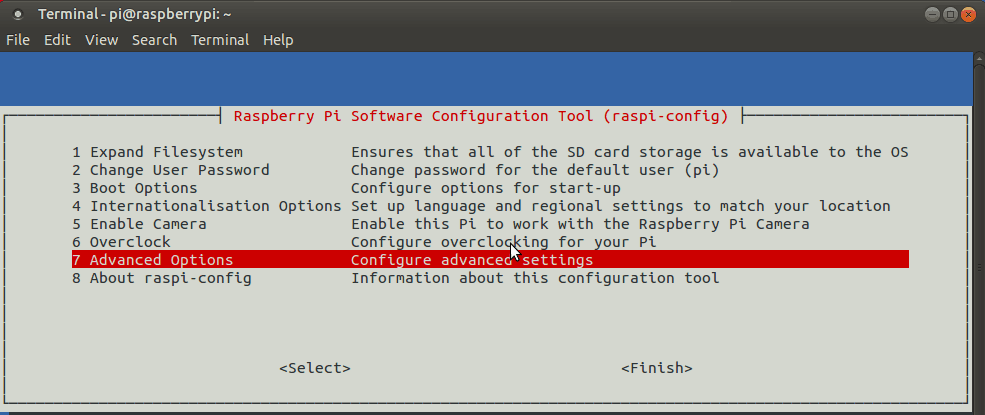
Next, we need to select the audio output to be used by Raspberry Pi. Open up the raspi-config configuration tool from the command line and follow the below procedure:
Select the menu sequence, “Advanced Options” > “Audio” and choose “Auto”
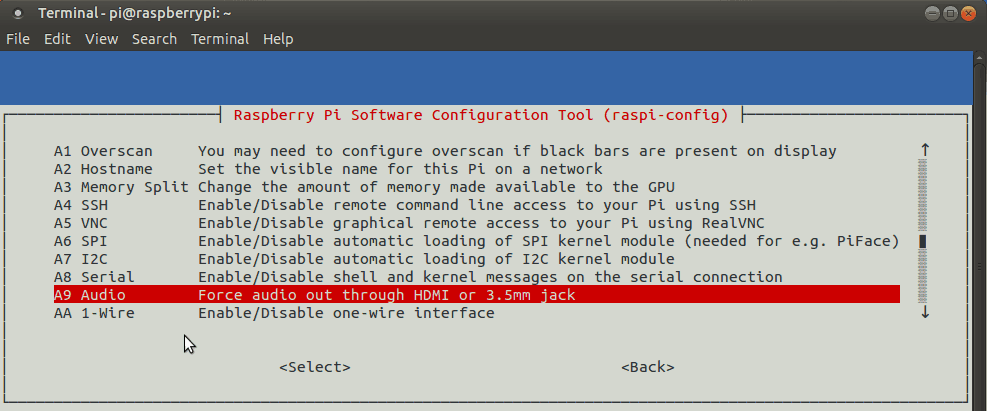
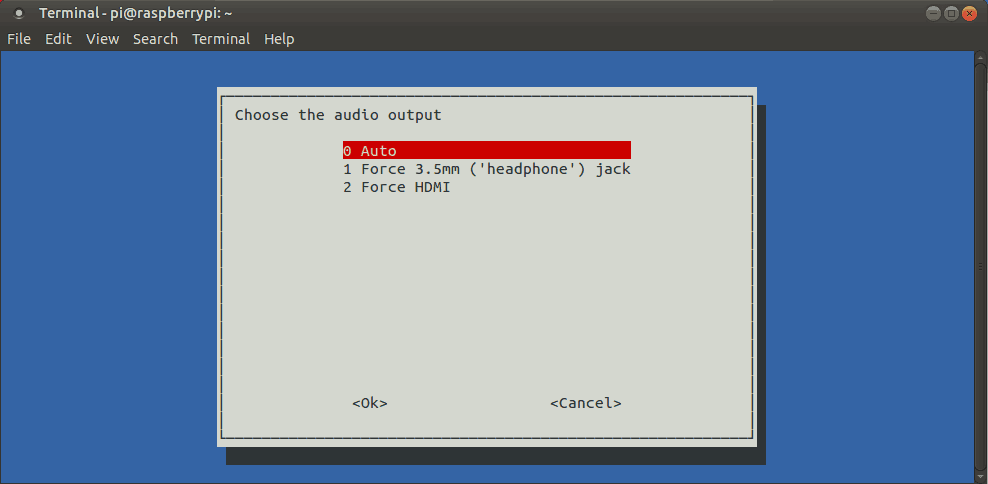
After selecting “Auto” mode, press the right arrow key to select button and exit the options list, then select “Finish” to exit the configuration tool.
This will enable the Raspberry Pi to autodetect the sound output and use either HDMI or audio jack depending upon which one is connected.
Step 5: Testing Audio
With the sound device setup, it’s time to test the application. Connect the speakers to the speaker jack on the sound card and play one of the test sound files provided by Raspbian OS.
aplay /usr/share/scratch/Media/Sounds/Vocals/Singer1.wav
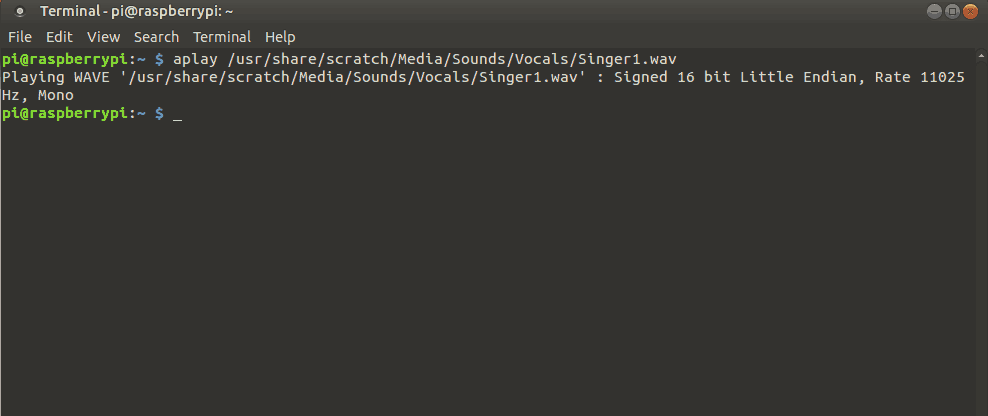
If everything went well, you should have heard a quick clip of an opera singer’s voice. If the audio volume is too high or low, then the volume can be adjusted by using “alsamixer” utility.
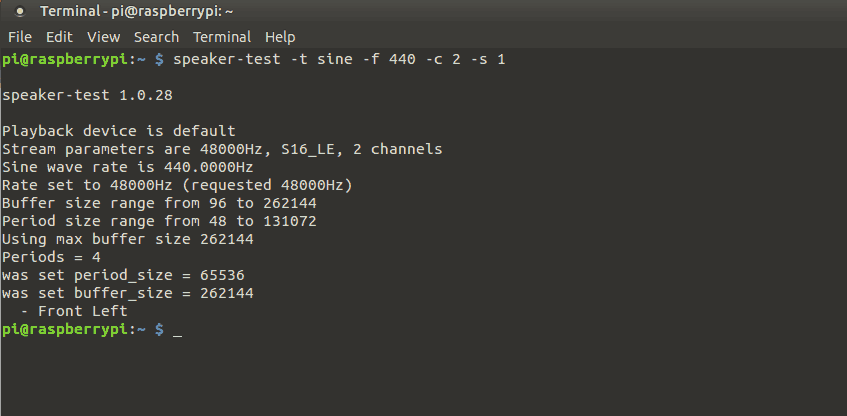
Additionally, you can use do the following to test and verify that the audio is working.
1. Use the speaker-test utility to play a sine wave through the USB output
speaker-test -t sine -f 440 -c 2 -s 1
2. Alternatively, you can also run the mpg321 utility to test and play a mp3 file.
Project Resources (Tools and SDKs)
We are going to use the following tools and SDKs for this application:
Raspberry Pi Audio Broadcast GitHub Repo (Demo source code)
Espeak: An open source text-to-speech synthesis program
PubNub Python SDK: PubNub Python SDK for realtime messaging between the requester and broadcaster
Setting Up the Hardware and Software
Hardware and Driver Setup
Setup the Raspberry Pi with USB sound card and attach the speakers to the sound card. Then, setup the sound driver and audio configuration as mentioned above. Make sure that you can hear the sample sound from the speaker.
Software Setup
Text-to-Speech Software
To convert the text to speech, install ‘ESpeak’ utility.
apt-get install espeak
To test espeak, invoke the espeak command with some text.
espeak "Hello World"
Assuming your sound device and audio configuration is setup correctly, you should hear the speech as per the text you passed to espeak command. ESpeak has a lot of options to select voice types, accents and playout speeds. But for now the default configuration is fine to demonstrate this application.
Audio Broadcast Application
First, check out the project GitHub repository for full code. The application consists of two python scripts, Requester.py and Broadcaster.py. Requester.py can run on any PC or computer as long as it has Python 2.7 installed with the PubNub Python SDK. Broadcaster.py runs on the Pi, under Raspbian OS (Jessie Lite).
To test this application, we have a sample message stored as a text file named message.txt (also under GitHub). The message words contained in this file are the ones which are eventually played out on Pi’s audio output by the broadcaster.
Testing the Audio Broadcast
Now, let’s test our application! Run the broadcaster script on Pi’s terminal console:
Before running, ensure that you are using either the “demo” or a valid set of PubNub keys on both the python scripts. Also, check the prerequisites mentioned in the README file. Now Run the broadcaster script on Pi’s terminal console:
python Broadcaster.py
And run the requester script on your PC or host computer.
python Requester.py
Click on the SoundCloud link below to experience the message broadcast.
[soundcloud url=”https://api.soundcloud.com/tracks/209985124″ params=”auto_play=false&hide_related=false&show_comments=true&show_user=true&show_reposts=false&visual=true” width=”200″ height=”150″ iframe=”true” /]
Although the audio speech output generated from espeak is quite ‘robotic’, we can get a better performance and more natural feel by trying out one of the commercial text-to-speech synthesis programs.
Code Walkthrough
PubNub Setup
Both the python scripts use PubNub Pub/Sub Messaging for exchanging information. In this application, we used two PubNub channels, one for sending the broadcast request and the second for receiving the response and indication for broadcast completion.
Sending Broadcast Requests
As the requester side, the contents of the message.txt are split into sentences so as to provide even spacing of the speech output while broadcasting the message. Each sentence is sent as a broadcast request and a completion signal is sent at the end to indicate end of broadcast.
[code language=”python”]
def process_request():
sentence = importData().split(".")
for data in sentence :
print "sending message: ",data
request={"type" : "request" , "play" : data}
pubnub.publish(pubnub_requestchannel, request)
lock.acquire()
pubnub.publish(pubnub_requestchannel,complete_sentence)
[/code]
After sending every request, the requester blocks until a positive response is received by the broadcaster indicating completion of broadcast. Upon receiving positive indication, the requester sends the next sentence.
[code language=”python”]
def _callback(message,channel):
if message["status"]== "positive":
lock.release()
elif message["status"]== "negative":
print "error in response"
elif message["status"]== "done":
sys.exit()
[/code]
Audio Playback
At the broadcaster end, all action happens inside the callback. Upon receiving the broadcast request from the requester, the broadcaster invokes the espeak TTS utility.
[code language=”python”]
def _callback(message,channel):
if message["type"]=="request" :
print " Received message = ", message["play"]
status=subprocess.call(["espeak","-s 120 -v en",message["play"]], stdout=FNULL,stderr=subprocess.STDOUT)
if status==0 :
pubnub.publish(pubnub_responsechannel, postive_response)
elif status!=0 :
pubnub.publish(pubnub_responsechannel,negative_response)
if message["type"]=="completed" :
pubnub.publish(pubnub_responsechannel, done)
sys.exit()
[/code]
When espeak completes broadcasting of text sentence, the broadcaster script sends a positive acknowledgment message back to the requester. In the case of an error, a negative acknowledgment is sent.
Wrapping Up
If you want to try out this application on your own, fork the GitHub repository and get the application program files and the broadcast message script, setup the hardware and software and you are good to go. To add some fun to the experiment, you can modify the broadcast script or create your own message and listen to it while it is being broadcasted.That’s it for this tutorial!
